27 Apr 2011

Almost finished!

Sorry for neglecting you so but I am not getting things done as fast as I want to. This latest quilt broke my back, literally. It took a long time and lots of blood sweat and tears, but I'm almost there. Just waiting for a new tack remover (old one died) and then I can take proper photos.

So here is a sneak peek, my first large quilt sewn on the machine.

Will post some proper pics in a few days.

Love, Nadine


And the back:


Posted using BlogPress from my iPhone

18 Apr 2011

Reversible Quilt as you go

I have finally worked out a way to do a reversible quilt as you go quilt on the sewing machine without any ugly mishaps and problems. I am sure other quilters have done it before me and probably even better but here is how I did it.

All the blocks, both front and back, are the same size and ready to be assembled into strips. The quilting has been done in a sort of spiral pattern.

The sashing on the front is 1 1/4 " wide in Kona Ash and the sashing on the back (Kona Snow) needs to be bigger, so I cut it to 1 3/4 ".

I pinned the 3 layers together with the Ash on the front.


... and the Kona Snow on the back.


and here is the triple sandwhich pinned together.


now I sew along the edge with a proper seam allowance.


then I pin the other side of the Ash sashing on the top to the edge of the next block and sew along the edge again.


turning the two attached blocks over looks like this.


and this it what is looks like on the back.


now I fold over the Snow sashing on the back along the seam and iron it flat.


and then I fold it over again to cover the seam on the next block.


pin the 3 layers together to fix the sashing on the back in place.


and I sew closely to the edge to attach the back sashing firmly.


the I sew along the other edge to make sure it looks even.

et Voila. this is what the 2 QAYG blocks look when attached this way.

on the the top


and the back.


I hope this makes sense.

Love, Nadine

12 Apr 2011

This took FOREVER

Here is the latest finished project: 6 placemats made using the leftover strips from the Spring in the Garden quilt.

It's strange but finishing these took me forever, almost as long as a whole quilt. The handstitched binding is probably to blame and of course the quilting. But i love it, the textures are great and my straightish lines are pretty good considering I'm new to using a sewing machine.

I hope you like them.

Love, Nadine


The back:


Posted using BlogPress from my iPhone

29 Mar 2011

Spring in the Garden Quilt finished

Woohooo, another quilt finished.

This is the third quilt I have finished in 2011 and I am starting to get used to working on a machine. It is faster, but not THAT MUCH faster than working by hand. Besides, these are all relatively small quilts.

But having the machine and working continuously has shown me very clearly once again how OCD I am. Not clinically or seriously in any way (I HOPE!), but bad enough that I feel the need to keep working on something until it is FINISHED.

I hate having things lying around that are unfinished, because I feel guilty, like I am cheating on them, if I even start dreaming of a new design and cutting into new fabrics. I will have to work on that. No more compulsive quilting. Oh, well, let's see how I do with that. I am certainly rubbish at giving up the compulsive snacking etc.

I really like this one. It's perfect as a baby quilt or a lap quilt and the colours really shine.

I am sorry for the poor quality pictures again. As soon as that spring sunshine arrives I'll take all my quilts outside and do a proper photo shoot so I can finally start listing them in my Etsy shop.

I hope you like this one.

Love, Nadine


Spring Quilt (the top):


Garden Quilt (the back)


PS: I just noticed in the pictures the one thing we should always try to avoid: CREASES! But no matter how I roll or fold my quilts I always end up with those nasty creases, (and this quilt has only been folded up for a handful of days). Any idea how to get rid of them?


Posted using BlogPress from my iPhone

28 Mar 2011

It's a HOOT!


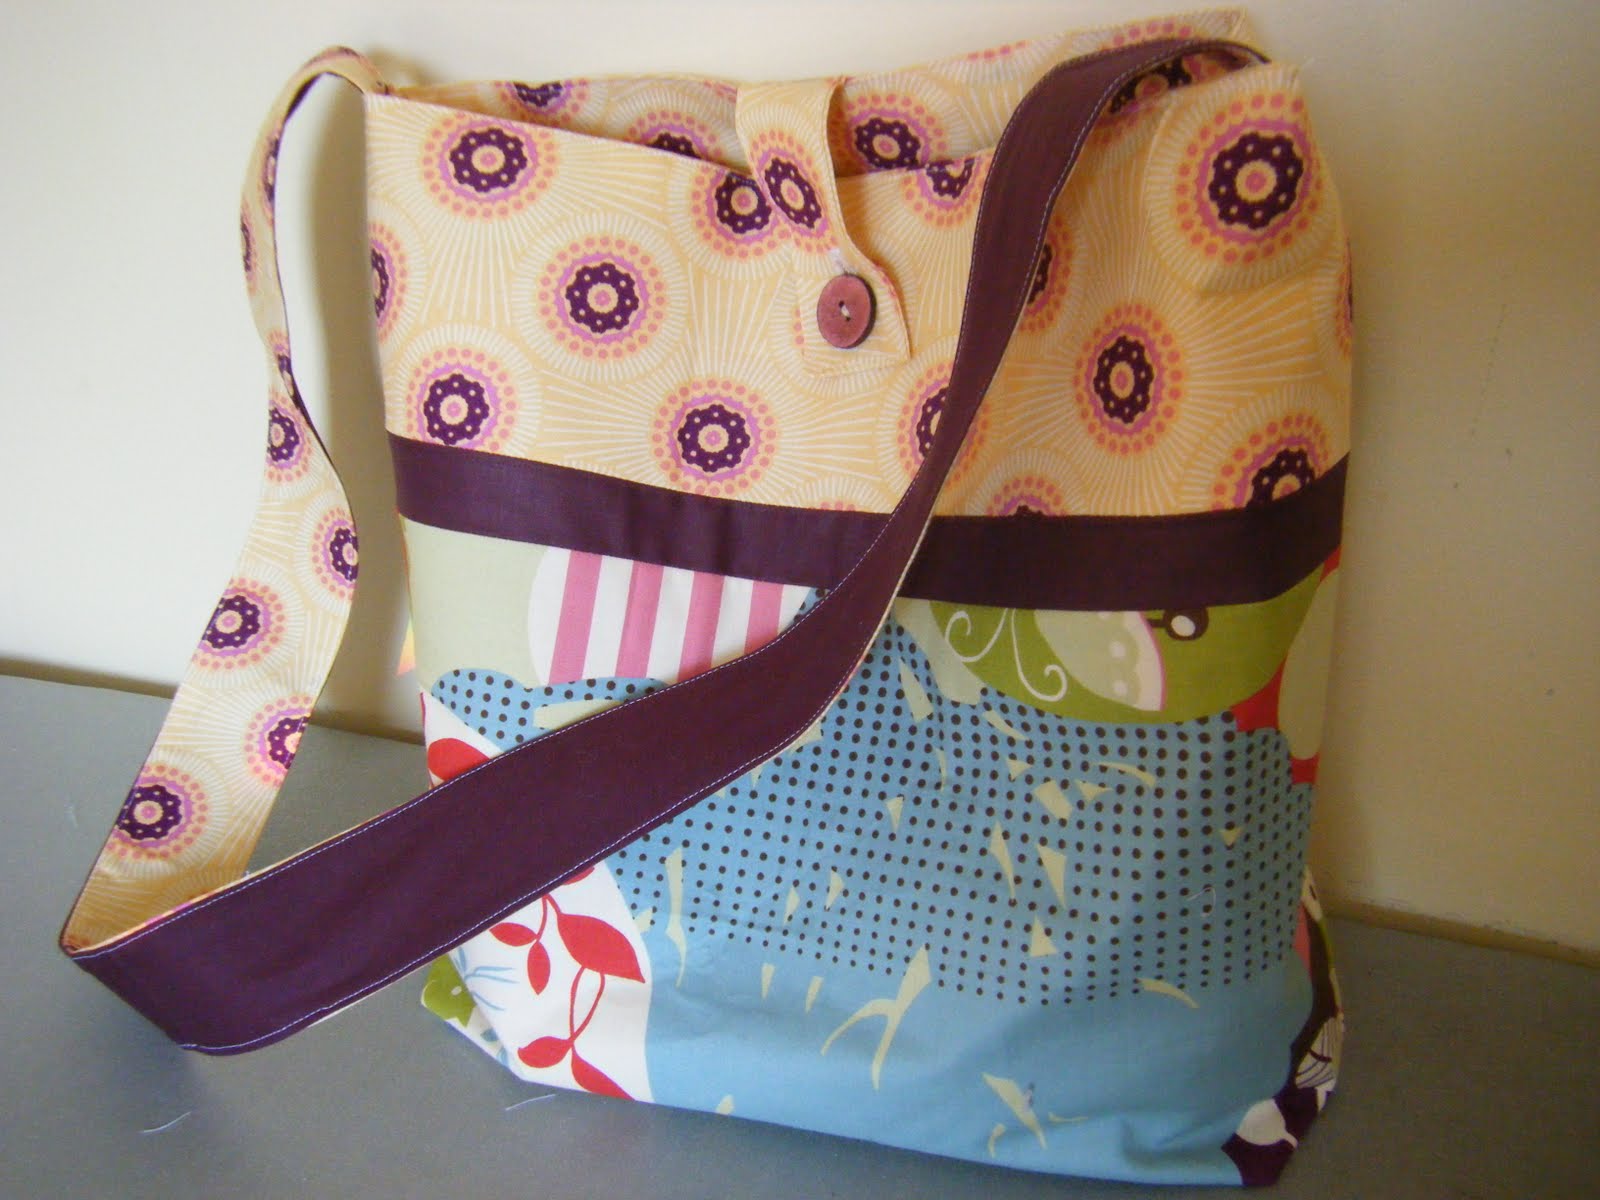
I have been experimenting a bit more with bag making and this latest one turned out quite well. I used It's a hoot and Crush fabrics and firm interlining.

I am still struggling a bit with the interlining actually.

I am still trying to find the right sort of interlining for bags like this one. The one I used just feels a bit too much like paper. I wanted to use something that is iron-on fusible and will stick to the fabric but it just doesn't feel right. If you have any suggestions I would really appreciate the advice.

Otherwise the bag is actually quite usable even despite some minor mistakes.

Let me know what you think.

Love, Nadine


I added two inner pockets, one open and one with a zipper


21 Mar 2011

Another new creation

I have developed quite a routine now for making these fabric storage boxes and I absolutely adore them. But I need to experiment with more techniques and shapes. Oh, so many things to make and so little time.

Love, Nadine


Posted using BlogPress from my iPhone

20 Mar 2011

We have a winner!


... and it is commenter number 3 which means Bek from Dreamfactory. Congratulations, can't wait to see what you'll do with them.

Check out her blog it's absolutely gorgeous.

Bek, could you please send me an email with your address and I'll get the fabrics into the post tomorrow.

Have a lovely evening, everyone, and happy sewing.

Love, Nadine